10.29.2009

Good Halloween Fun

I'm always a big fan of Halloween! However, the Jenkins household has now turned into the Den of Sickness. Ava was out of school for an entire week two weeks ago and now, both Andrea and Ezra have been hit with the same bug. It's only a matter of time for it to hit me, I guess. In the meantime, I've scanned some pages from a cool textbook reader originally published in 1957. Checkit:

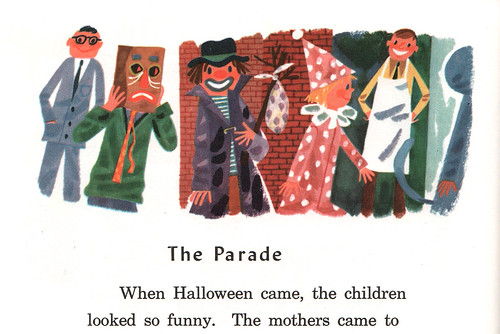
Good Halloween Fun 1

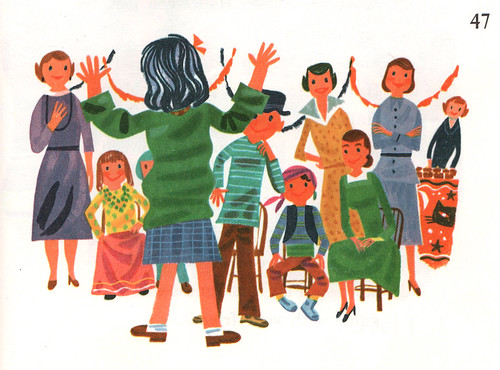
From Billy's Neighbors, a reading textbook by Follett Publishing Company. Authors are Alta McIntire & Wilhelmina Hill. Illustrated by the very talented Janet LaSalle. ©1957; this edition, 1962.

If I could scan this entire book, I would. Illustrated on almost every single page, filled with incredible artwork by Janet LaSalle. I've talked about Janet before. (See previous post and this set for her earlier style, and this.) Just check her stuff out. Amazing talent.

Good Halloween Fun 2

Good Halloween Fun 3


Good Halloween Fun 4

Good Halloween Fun 5

Good Halloween Fun 6

Have a great and safe (and healthy) Halloween, kids!

10.17.2009

Where The Wild Things Are: an Observation

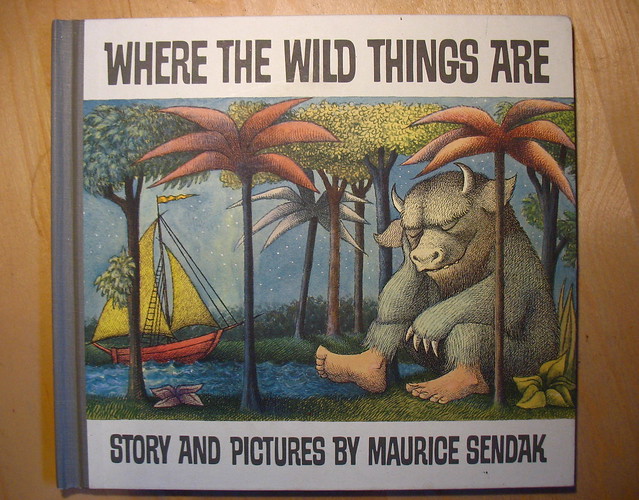
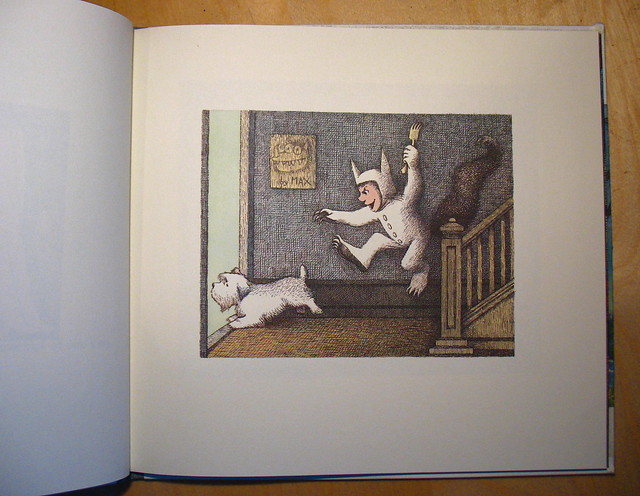
Where The Wild Things Are 1 Where The Wild Things Are, by Maurice Sendak. All images here © 1963, HarperCollins Publishers.


With all the talk about the film, I thought I'd share with you some observations about the iconic children's book by Maurice Sendak from 1963.

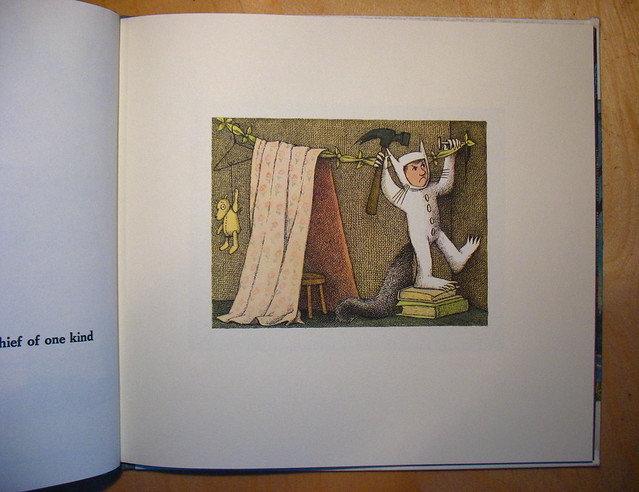
Where The Wild Things Are 2
Have you ever noticed the way Sendak constructed the story for Where The Wild Things Are visually? There's a lot more going on. Notice how small the first image of Max is here. He's completely surrounded by white space - a victim of being boxed in. A reason for his mischief? Who knows. It's possible.

Where The Wild Things Are 3
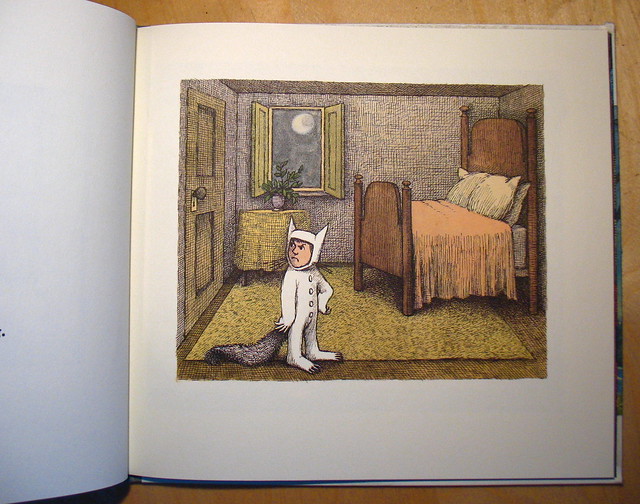
You turn the page and now the actual image has grown ever so slightly.

Where The Wild Things Are 4
As Max is sent to his room, the image grows a bit more, allowing him now to build upon his own imagination.

Where The Wild Things Are 5
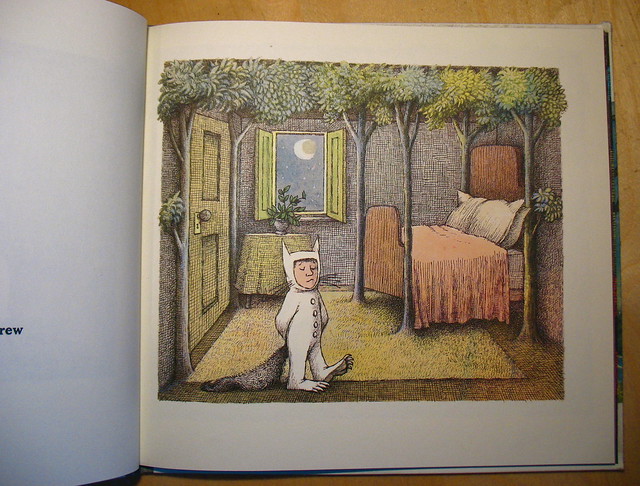
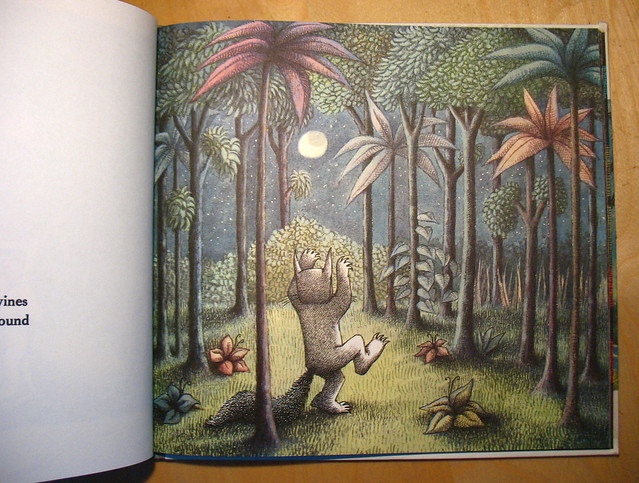
Now, as we slip out of reality and into fantasy, the image grows even more, just as his forest grows. Notice how even the trees break free from the stiff borders, adding to the fantasy element.

Where The Wild Things Are 6
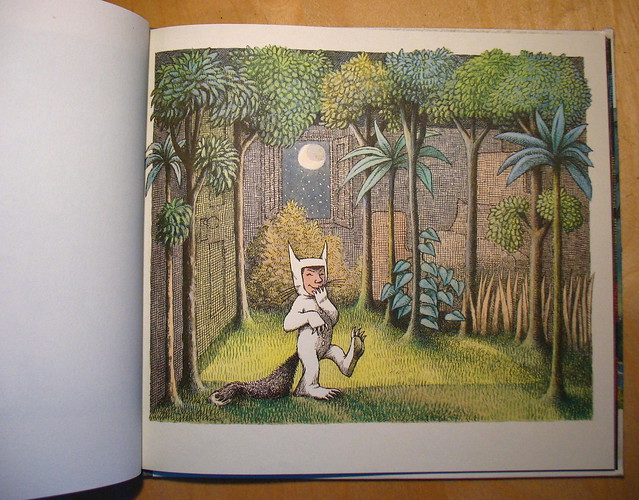
Max is happier now that his own version of reality (or alternate reality) continues to grow.

Where The Wild Things Are 7
It is here where the image completely covers the page. There is no more white surrounding Max and his world.

Where The Wild Things Are 8
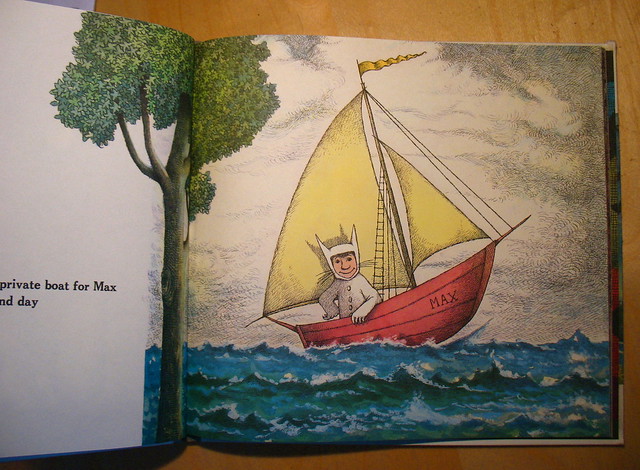
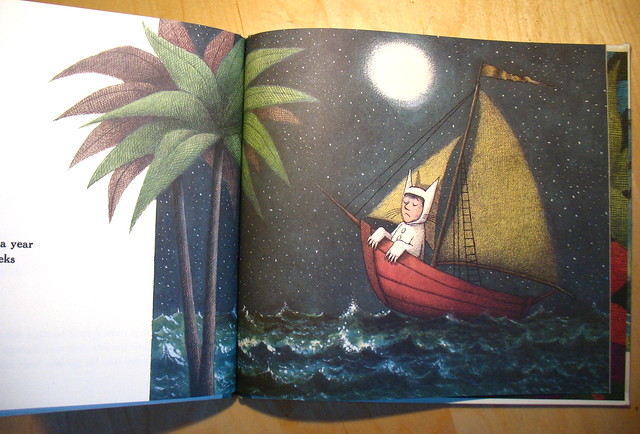
But wait! It's not over. Turning the page, we notice that the image continues to grow even more. If you think about it, this makes sense as Max starts out on his journey.

Where The Wild Things Are 9
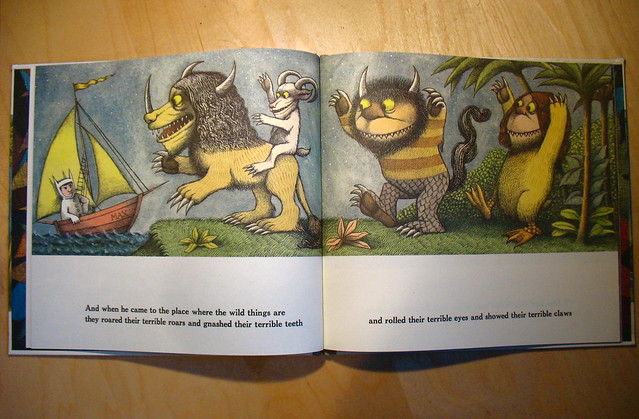
Several pages over and Max has come to the place where the wild things are. At this point, the overall image now stretches from left to right, with white still shown below.

Where The Wild Things Are 10
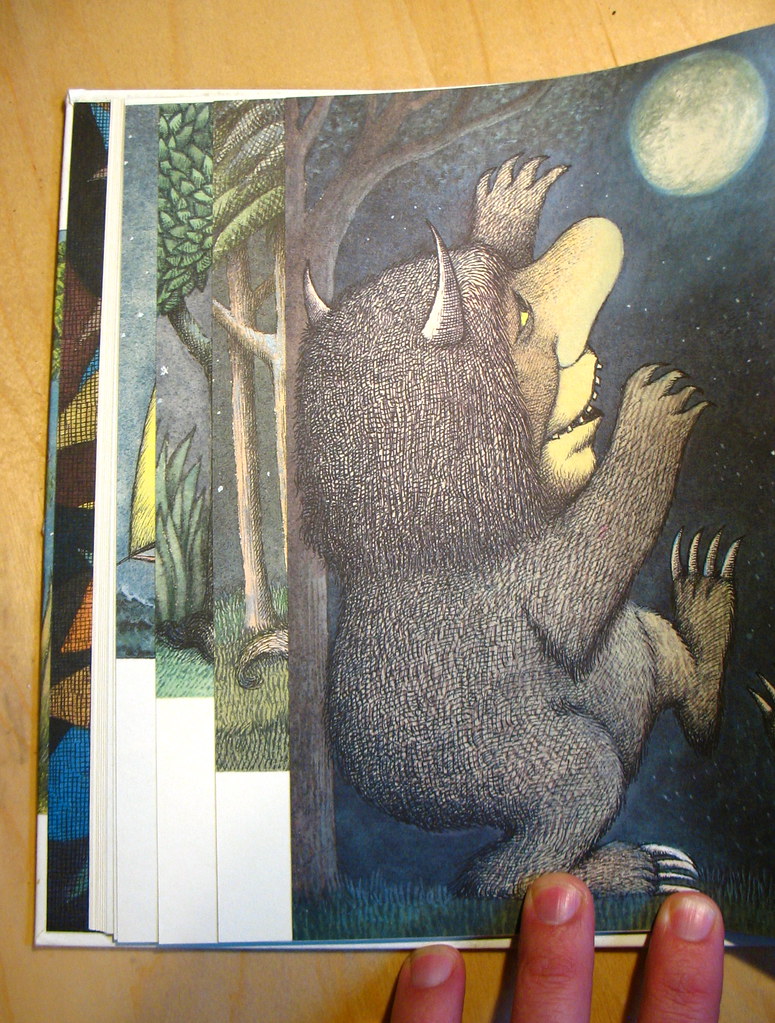
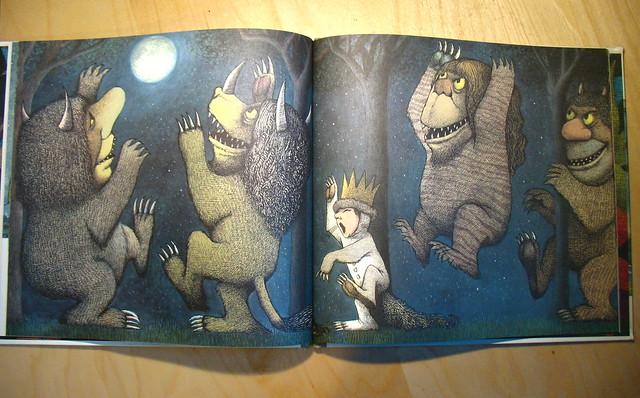
While Max is now at the place where the wild things are, notice how the image still continues to grow. It's such a subtle thing, but subconsciously, I think the reader knows it's happening. Roughly at about the two/thirds mark in the book, the wild rumpus starts and as we turn the page....

Where The Wild Things Are 11
...the image now completely covers the entire spread. There is no more white space, no more words. Max is deep within his world here, and we are completely engrossed by this visual cue.

Where The Wild Things Are 12
After about three spreads of pure images (the wild rumpus), the story takes a turn back to reality. Max stops the rumpus and now, white space reappears on the page and the image starts to shrink for a few pages.

Where The Wild Things Are 13
Max's journey back home is similar to when he left - completely filling one page and then spilling out onto the other.

Where The Wild Things Are 14
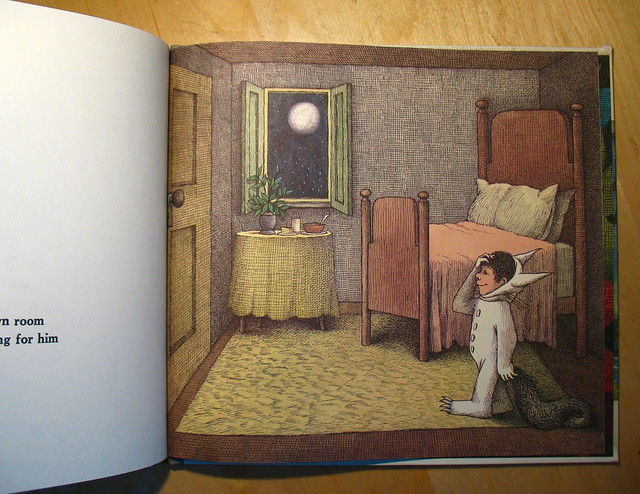
And now, for the last image of the book, Max is back home, room back to normal, now filling the entire page. No more white space surrounds him (I'm not counting the other page), suggesting that maybe Max worked out his issues. Perhaps? It's possible. All is right in the world, as he can now eat his supper. Still hot.

As I child, I remember a few things about this book. I don't think we owned it, but probably checked it out of the library. Sendak's style and the way he drew the wild things definitely left a strong impression on me. They were unlike anything I'd seen before. What hits me the most is when the tone of the book changes. It's when the wild things want Max to stay. When they yell out that they'll eat him up! This evoked a strong sense of fear and danger in me when I was young. Wow - a kid's book where the bad guys want to actually eat up the kid! I thought. It was dangerous. And compelling.

I haven't seen the movie yet, but I want to. I plan to see it soon.


10.16.2009

Monster Cereals Disco

Okay, so I'm trying my best at not getting riled up by the fact that General Mills (the company behind such wonderful cereal products as Cocoa Puffs, Cookie Crisp and more) seems to completely ignore the Monster Cereals. Even though the cereals are still being made (evidence here), the powers that be at GM still won't make any new animated commercials for the cereal line. Why is that? Look, guys. It's a no-brainer: three cereals (originally five: Fruit Brute and Yummy Mummy aren't made anymore) that have a built-in audience - an audience, mind you that is now grown up and has children of their own. This audience ("Gen-X"ers, I guess you could call them) share a deep devotion to their childhood (well, who doesn't, right?). I'm pretty sure there's a story to be told from anyone who grew up watching Saturday morning cartoons during the 70's and remembers these three colorful monsters gracing their television set: Count Chocula, Franken Berry, and Boo Berry. For me, I was a big fan of Franken Berry (never liked how Count Chocula tasted). However, what I really, REALLY wanted was Boo Berry. But it was not to be. For some reason Boo Berry was never available in the metropolitan area of Atlanta. Why? What was so bad about Atlanta that General Mills deemed it Boo Berry free? I had no idea. With each viewing of every Monster Cereals commercial, my anger raged at the fact that Boo Berry would never be in my grasp. It was my white whale. I know, obsessive Ahab tendencies at such a young age.

Back to the moment at hand: there are some who want the Monster Cereals back on the small screen and have started a blog totally devoted to the ghastly three: Monster Cereals Blog. There, you can check out lots of images and movies and anything related to Count, Frank, and Boo. If you're an artist, it might be of some interest for you to know that October is Fan Art Month. I'm thinking of participating. Once I find the time, of course!

Anyway, what I want to share with you all are a couple of videos that these particular Monster Cereal fans have made, each sharing the same audio (with voices taken from various commercials and from a flexi-disc record that was free on the back of boxes in 1979 - hence the disco reference), but having two entirely different visuals. The first features original animation by...well, I don't know. Anonymous? Checkit out:


For those who remember the commercials, you'll dig the second, "classic animation" version, featuring a wide assortment of clips throughout the years. Ahh, yes:


I want to see the Monster Cereals back in action on TV. Badly. So, here's the thing: word has it that if there's enough interest in these videos, in the blog, in the Monster Cereals Facebook page, etc. - if there's a big enough ground swelling of Monster Cereals Mania, then there's a possibility that General Mills might cave in. I want them to cave in, see. I want them to cave in BIG TIME.

Pass the word on.

10.12.2009

Step-by-step: King of Putdowns

Hi guys. Thought I'd enlighten your day by sharing with you a sort of step-by-step process of how I created the illustration I did for Guide Magazine, The King of Putdowns (see previous post). Since I didn't take screengrabs while I was working, I can at least show you some of the layers by themselves, with a chance to view the images closer. I know that everyone has their own way of working, and by all means I'm not suggesting that any of you work exactly like me - this is just a hey, check it out! kind of thing. Hope you enjoy!

Roughs
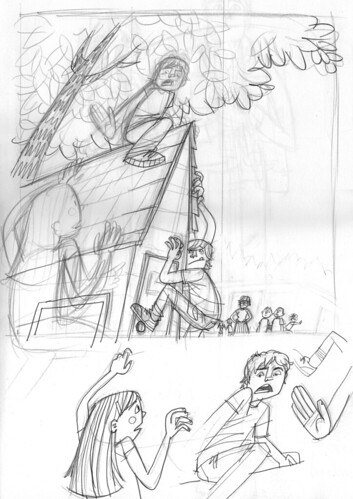
Putdowns step-by-step: early sketch
After reading the short story for Guide magazine, it was suggested that maybe we could use a low perspective, looking up at the scene. I went with this and created this first sketch in my larger sketchbook. I did a couple of extra drawings for the main character and his hand, along with the girl climbing up the playhouse. (It's a playhouse situated in the back of a school's playground, abutted up against the woods.)

Putdowns step-by-step: rough layout
This is the first rough I sent to Guide after I scanned in all the elements and put them together in Photoshop. I don't normally do the grey painting for the various background items (such as the tree and playhouse here), but I think I like it. It helped me keep an eye on how the tones and colors might work in the final version.

Final Pencils

Putdowns step-by-step: final scan 1
Once I get the okay, I then print out the rough and create tighter pencils of each item by tracing over the rough. At this stage, I may change a couple of things as I'm going along - like the girl's expression, for instance. I also changed the pose of the main character, pushing it further, making him more in opposition of the girl climbing up. I also changed the other boy's pose - he looked strange hugging the playhouse in the rough version.

Putdowns step-by-step: final scan 2
Here are the final pencil scans of the playhouse, people in the background, and some leaves. I ended up not using any of the leaves over on the left, save those two that are not touching any other leaves. I then used those, along with the others on the right side of this scan, to create the leafy pattern for the final version. Lots of duplicates. Lots. On the bottom there, you'll see the teacher looking disapprovingly at the situation, along with two classmates. There are a few kids in the background as well. All these extras ended up getting nixed in the final version. I felt that it was taking away from all the action going on at the playhouse.

Color
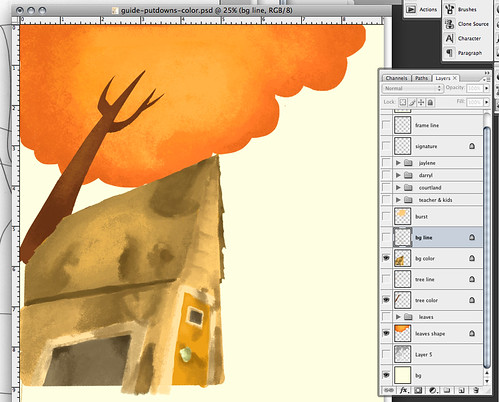
Putdowns step-by-step: background color
Closer look.

Again, sorry I don't have a step-by-step of my process on this piece, so I have a couple of the layers spotlighted for you. Here, you'll see the background color layer (as well as the tree color layers). As you can see in my layers on the right, I have two main layers for each item: line and color. Sometimes (not always) I'll put the pastelly-brushy effect on its own layer, separate from the color layer. That way, I can do alternate versions if necessary. But honestly, that requires time and usually I don't have much of that when I'm working.

Putdowns step-by-step: girl line
I never merge the line layer with the color layer. Never! Even if the line will be the same color as the color layer underneath. I just never do it. I've learned my lesson throughout all the years I've done this. As you can see, I ended up adding a pine cone in the girl's hand (I drew and scanned this hand with pine cone separately) after re-reading the story and realizing that the girl ended up throwing a pine cone at the main character while she was climbing up the playhouse.

Putdowns step-by-step: girl color
It's rare when I see the layer like this. I always keep the line layer open so I can see the two layers together.

Putdowns step-by-step: girl final
Closer look.

And here are all the layers together. For the girl, since I had a different hand, I ended up separating the throwing arm from the body just in case I needed to shift it for a better composition.

Putdowns step-by-step: boy line
Courtland is this boy's name. His brushwork I did differently because he had a pattern on his shirt and shoes. Instead of trying to work out the brushy look on the color layer (where the patterns were), I did all the brushy shading on a separate layer, usually sandwiched between the line and color layers (here, the shading layers are on top). Well, as you can see, the shoes and shirt each had its own brushy shading layer (in case I needed to alter the opacity for each item, which I did). I do this only when the pattern underneath will be difficult to work with when it comes to the shading. Otherwise, I'd much rather work with the colors themselves instead of relying on a basic color for the shading. FYI: I never work with black or grey for the shading, unless the main color is grey itself. In order for the shadows and shades to be richer, fuller color, always work off of the original color.

Putdowns step-by-step: boy color
For Courtland's color layer, I did all the brushy shading like I normally do on all the sections without patterns: the hair, skin and jeans.

Putdowns step-by-step: boy final
Closer look.

And Voilá!! Courtland all colored and done. Here's the final again:

King of Putdowns
Closer look.

This process is a holdover from my days working in animation. I still use my animation disc and even use leftover animation stock paper when I work on the final pencils. Having pegbars and pegbar holes to better register the paper works perfectly for me. My entire children's book How To Train With a T.Rex and Win 8 Gold Medals was created using this method and it's worked pretty well for me so far. The concept of separating all the elements and then putting them all together like puzzle pieces is pretty much how we do animation, if you think about it. A sure fire way of making sure I don't get caught having to do extra work than necessary.

If you have any thoughts, questions, suggestions about this post, feel free to leave a comment below! I'd love to hear from you.